DIY No-Drill Tension Storage Bracket: A Custom-Made Tool for Japanese Rental Apartments

1. Introduction
Living in Japanese rental apartments comes with an unshakable rule: the obligation to restore the property to its original condition. Most landlords strictly prohibit drilling holes, nailing walls, or making permanent modifications, as any irreversible damage will lead to heavy deposit deductions. Meanwhile, typical Japanese rental units feature compact layouts, narrow wall gaps, and limited built-in storage space, leaving residents struggling with scattered daily supplies. To solve this universal dilemma, a no-drill tension storage bracket is designed as a handmade, low-cost, and fully removable DIY tool. This self-made tool requires no professional craftsmanship, uses affordable daily materials, and perfectly fits the spatial characteristics of Japanese rentals. It creates extra storage surfaces without leaving any traces on walls, ceilings or furniture. Beyond basic storage functions, its minimalist and adjustable structure adapts to diverse apartment layouts, making it a practical necessity for foreign students and young tenants in Japan.
2. Raw Materials & Tools Preparation
All selected materials are easy to purchase at Japanese 100-yen shops, home centers, and convenience stores. They are lightweight, eco-friendly, and leave no residual glue or damage after removal. No expensive electronic processing tools are required, lowering the production threshold for beginners.
2.1 Raw Materials
- Adjustable tension rods (2 pieces): Standard spring-loaded tension rods with a stretch range of 30cm to 120cm. Made of anti-slip metal and rubber end caps, customized for narrow gaps between walls, cabinets and refrigerators.
- Transparent PP plastic board (1 piece): 5mm thick, cuttable hard plastic board, waterproof and dustproof. It serves as the main bearing platform and is resistant to deformation under daily weight.
- Silicone anti-slip gaskets (6 pieces): Ultra-thin self-adhesive silicone pads, used to increase friction between the tension rods and the plastic board to prevent sliding.
- Removable double-sided adhesive dots (8 pieces): Glue-free trace adhesive specially designed for Japanese rentals. It can be peeled off without damaging paint or wallpaper.
- Elastic binding bands (4 pieces): Tear-resistant flexible bands for auxiliary fixation to enhance the overall stability of the bracket.
2.2 Auxiliary Production Tools
- Mini plastic cutting knife (safe for manual cutting, no sharp metal edges)
- Soft measuring tape (to fit irregular narrow gaps in Japanese apartments)
- Smooth sandpaper (for polishing cutting edges to avoid scratches)
3. Step-by-Step Production Process
The entire production process takes approximately 25 minutes. The steps are simplified and beginner-friendly, with no professional DIY experience required. Every operation complies with the non-damage rental regulations in Japan.
Step 1: Measure and Customize the Board Size (5 minutes)
Use the soft measuring tape to detect the gap width between two vertical planes—such as the space beside the bathroom vanity, the gap between the kitchen cabinet and the refrigerator, or the empty wall corner in the bedroom. Record the actual spacing data, then mark the cutting range on the PP plastic board. Reserve an extra 3cm margin on both sides for structural stability. Cut the board along the marked line with the plastic cutting knife, and polish all sharp edges with sandpaper to eliminate burrs. This tailored size design ensures the bracket fits the cramped fragmented space of Japanese compact apartments.
Step 2: Install Anti-Slip Auxiliary Accessories (7 minutes)
Flip the cut plastic board to its backside. Paste six silicone anti-slip gaskets symmetrically at the pre-marked stress points—two near the front edge, two in the middle, and two at the rear end. The gaskets form concave clamping positions to fit the radian of tension rods. Then attach four removable double-sided adhesive dots on the four corners of the board back. These adhesive dots will lightly bond with the tension rods without producing permanent adhesion, ensuring easy disassembly.
Step 3: Fix Tension Rods for Structural Support (8 minutes)
Adjust the length of the two tension rods according to the measured gap distance, and twist the fixed buttons to keep the rods in a semi-stretched state. Place the two parallel tension rods on the corresponding anti-slip gaskets of the plastic board, aligning the rod bodies with the adhesive dots. Press gently to make the adhesive dots fit closely with the metal rods. Then fasten the overlapping positions of rods and the board with elastic binding bands to strengthen the connection, preventing shaking caused by accidental collision.
Step 4: Position and Apply Pre-Tension (5 minutes)
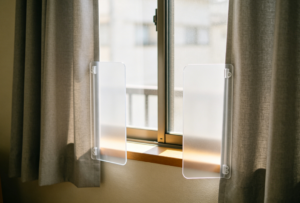
Hold the assembled bracket horizontally and insert it into the predetermined gap. Gradually lengthen the tension rods until the rubber end caps tightly press against the two vertical planes. Apply moderate tension to ensure the bracket remains stable without squeezing the wall surface. Wipe the contact points between rubber caps and the wall to remove dust, which further improves friction and avoids positional displacement. After completion, gently shake the bracket to test its stability; no obvious shaking indicates successful production.
4. Tool Usage Guide & Functional Scenarios
This handmade tension storage bracket breaks the usage limitations of single commercial storage racks. It features multi-scene adaptability, flexible adjustability, and zero-damage removal. It covers daily storage demands in kitchens, bathrooms, bedrooms and balconies of Japanese rental houses.
4.1 Core Usage Methods
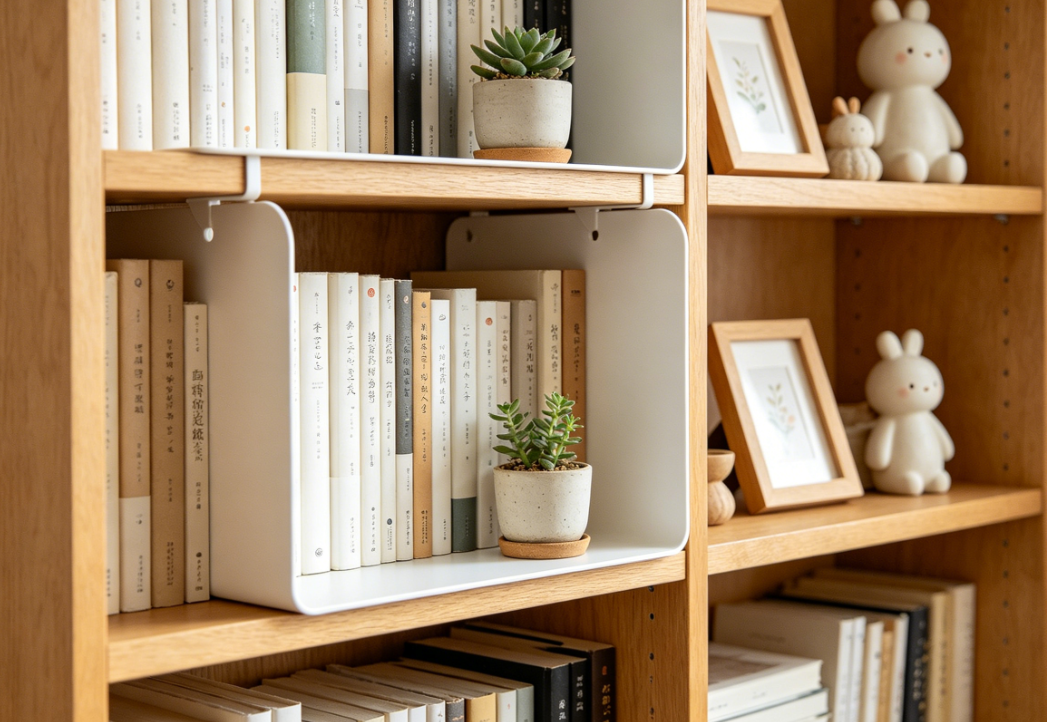
- Load-bearing control: The reasonable bearing weight of the single-layer bracket is within 3kg. Place lightweight daily items such as seasoning cans, skin care products, stationery and small potted plants to avoid structural deformation caused by overloading.
- Angle adjustment: Loosen the tension rod fixing buttons to fine-tune the horizontal tilt angle of the board, which adapts to the uneven wall surfaces common in old Japanese apartments.
- Trace-free disassembly: When moving or cleaning, shorten the tension rods to release pressure, then take down the bracket directly. Tear off the adhesive dots slowly at a 45-degree angle; no glue residue will remain on walls or rods.
- Combined assembly: Purchase multiple sets of tension rods to stack brackets vertically, making full use of vertical gap space to expand three-dimensional storage capacity.
4.2 Diversified Application Scenarios
- Kitchen gap storage: Install the bracket in the narrow gap beside the refrigerator to store condiment bottles, cleaning sponges and disposable tableware, optimizing the compact kitchen counter space.
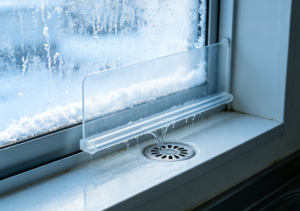
- Bathroom humid-proof placement: Fix the bracket above the bathroom washing basin to place facial cleanser, makeup cotton and combs. The waterproof PP board isolates moisture and avoids mold growth.
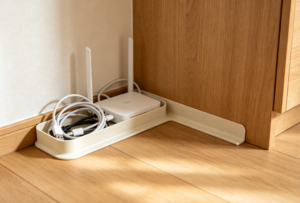
- Bedroom corner sorting: Clamp the bracket in the corner of the wardrobe to store accessories, earrings and portable chargers, tidying up scattered personal small items.
- Balcony sundry arrangement: Arrange the bracket on the balcony wall gap to place small gardening potted plants and cleaning tools, beautifying the balcony layout without occupying walking space.
5. Design Concept & Unique Advantages for Japanese Rentals
5.1 Compliance with Local Rental Rules
Different from punched metal brackets and glued fixed shelves, this handmade tension bracket relies purely on physical extrusion force for fixation. It never damages wall paint, wallpaper or floor tiles, fully conforming to Japan’s genkyo fukugen (original restoration) clause. Tenants do not need to worry about deposit forfeiture during moving, which is the core design consideration for rental residents.
5.2 Adaptation to Japanese Spatial Characteristics
Most Japanese rental apartments are built with narrow gaps and fragmented blank spaces between furniture and walls. Commercially sold finished shelves have fixed sizes and poor compatibility. This customizable DIY bracket can be cut and adjusted arbitrarily to fit irregular gaps of 30–120cm, activating the wasted blank space in the room and maximizing the utilization rate of small apartment area.
5.3 Low-Cost & Sustainable Circulation
The total production cost of one bracket is less than 1200 yen, far cheaper than customized commercial storage racks. All materials are reusable. After moving, the tension rods and plastic board can be disassembled and stored, and re-assembled for use in a new rental house. It meets the low-consumption living concept pursued by most young people in Japan.
6. Maintenance & Optimization Tips
- Clean the silicone gaskets and rod contact surfaces every two weeks to remove dust and oil stains, maintaining anti-slip performance.
- Avoid placing high-temperature items on the PP board; the applicable temperature range is 0℃ to 45℃ to prevent material aging.
- For long-term use, replace the adhesive dots every three months to ensure stable bonding force.
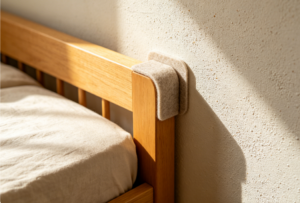
- Wrap soft foam on the two ends of tension rods to further protect the wall corners from extrusion wear.
7. Conclusion
The handmade no-drill tension storage bracket is a pragmatic tool tailored for the living pain points of Japanese rental tenants. It combines simple physical mechanics, low-cost daily materials and localized rental rules into one practical design. Its production process is concise, its usage scenarios are diverse, and its trace-free disassembly feature solves the biggest restriction of rental DIY. Beyond its storage function, this tool reflects a refined living philosophy—making the most of limited space with minimal modification and low investment. For residents living in compact Japanese apartments, this self-made bracket is not merely a storage tool, but also a smart solution to balance spatial utilization and rental compliance.