Renter-Friendly DIY: Craft a Low-Profile Cable Concealing Channel for Cluttered Japanese Rental Rooms
Introduction
The majority of aging Japanese rental apartments suffer from unreasonably positioned power outlets. Sockets are often installed high on walls or hidden behind furniture, forcing tenants to extend long power strips, charging cables, and router wires across bare floors. Exposed cables tangle easily, collect dust, and create tripping hazards in narrow walkways. Furthermore, permanent cable trunking and drilling wall grooves are strictly forbidden under Japanese lease terms, leaving visible wiring as an unavoidable interior flaw. To organize messy circuits without damaging wall surfaces, renters can construct aflexible self-adhering cable concealing channel. Assembled from bendable plastic strips and residue-free adhesive film, this slim handmade casing bundles loose wires into neat invisible pathways. Beyond basic tidying functions, this subtle tool reflects restrained Japanese spatial aesthetics: eliminating visual chaos without altering architectural structures.
Design Concept of the DIY Cable Channel
Unlike rigid hard plastic commercial trunking that cannot bend around room corners, this handmade cable channel adopts a foldable segmented structure tailored for irregular Japanese apartment layouts. It follows three renter-oriented design principles: flexible bending, traceless adhesion, and detachable maintenance. Many old Japanese walls have uneven plaster surfaces; the soft plastic base fits subtle undulations and maintains seamless pasting. Instead of completely sealing wires inside hard shells, this semi-open groove allows natural heat dissipation for overheated chargers and router cables. Its matte neutral color blends into plain wall tones, reducing visual interruption within compact living spaces.
Required Materials (Available at Japanese 100-Yen Shops)
- Soft matte PVC plastic bending sheet (tough foldable material)
- Clear removable nano adhesive film (wall-safe residue-free tape)
- Thin silicone clamping strips for wire fixation
- Small transparent cable buckles
- Round-edge precision cutting scissors
Step-by-Step Fabrication Process
Step 1: Plan Wiring Route and Cut Plastic Sheet
Inspect scattered cables, including router lines, charging cords, and extension power strips. Draft a simple wiring route along wall edges, skirting lines, or furniture backs to avoid pedestrian traffic areas. Cut the soft PVC sheet into long narrow strips with consistent width. The strip size is designed to hold two to three ordinary cables without overcrowding. Trim all edges smoothly to prevent sharp plastic corners from scratching wall paint or insulation layers of wires. The flexible PVC material retains durability after repeated bending, suitable for long-term indoor placement.
Step 2: Fold Sheet into U-Shaped Groove
Manually fold the flat PVC sheet into a shallow U-shaped channel. Moderate bending depth balances wrapping capacity and low-profile appearance; an overly deep groove creates bulky visual volume, while an excessively shallow structure fails to fix cables steadily. Pre-fold bending marks at right angles to adapt to wall corners and furniture edges. The smooth inner surface prevents cable abrasion during daily pulling and slight movement.
Step 3: Install Silicone Clamping Strips
Attach thin silicone clamping strips symmetrically on the inner edge of the U-shaped groove. These elastic soft strips generate gentle squeezing force to hold cables firmly, preventing them from slipping out of the shallow channel. The non-slip silicone also reduces vibration friction between wires and plastic shells, lowering subtle dragging noise. For thick power adapters, users can cut partial silicone strips to expand local accommodation space.
Step 4: Apply Adhesive Film and Complete Installation
Paste transparent nano adhesive film evenly on the outer back of the plastic groove. Clean wall dust before pasting to strengthen adsorption strength. Align the finished channel along the planned wiring path and press firmly to exclude air bubbles. For turning points, cut intermittent folding gaps to achieve smooth curved attachment. The entire installation requires no liquid glue or drilling, ensuring zero wall damage and easy removal during relocation.
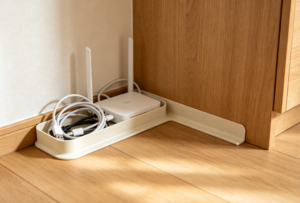
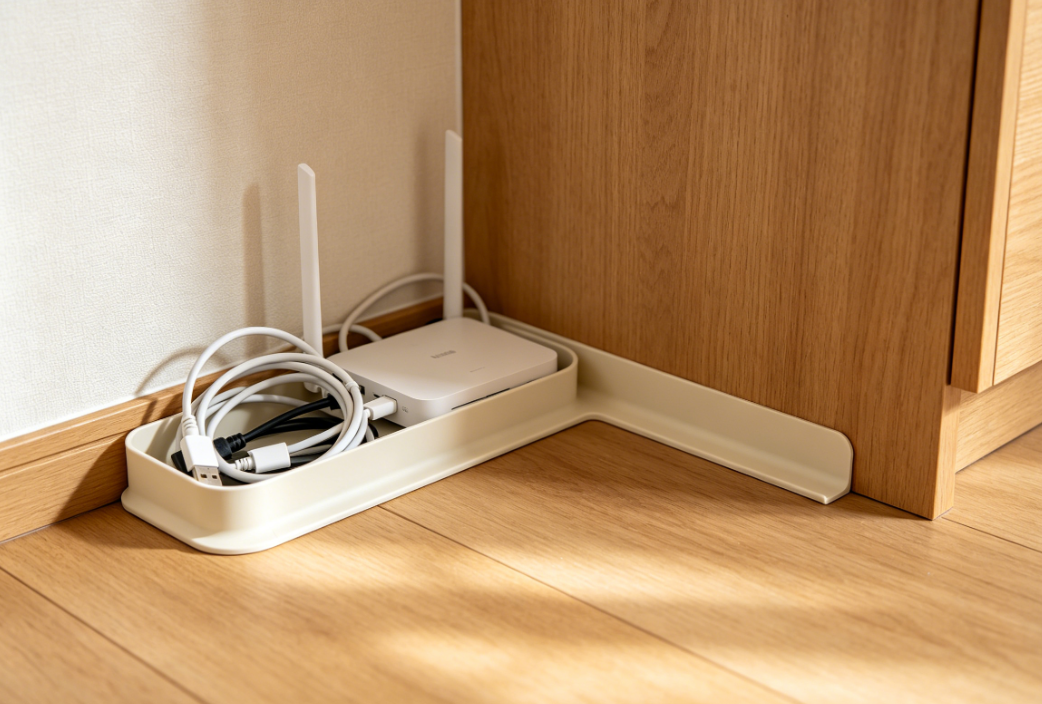
Daily Usage and Functional Advantages
This handmade cable channel effectively eliminates wiring chaos in narrow rental rooms. It bundles scattered electronic wires together, reducing dust accumulation in tangled gaps and simplifying routine wiping cleaning. The low-profile shell prevents residents from accidentally stepping on exposed cables, improving walking safety in cramped bedrooms. During Japan’s dry winter season, the insulated plastic shell isolates static electricity and reduces dust adsorption on wires. When maintenance is needed, the open-groove structure allows convenient wire replacement and inspection. All components can be peeled off, cleaned, and reused for future apartments.
Broader Reflection: Taming Invisible Electronic Chaos
Modern Japanese rental buildings prioritize architectural simplicity while ignoring electronic wiring demands. Fixed socket positions cannot keep pace with diverse digital devices, inevitably generating messy extended circuits. This handmade cable groove represents a mild reorganization of technological clutter. Tenants do not reconstruct wall circuits; instead, they build soft artificial pipelines to discipline wandering wires.
Moreover, the folding and pasting process cultivates spatial tidiness awareness. In the digital age, invisible wires quietly erode interior order. Cutting plastic, folding grooves, and arranging lines encourage renters to observe overlooked technological details in daily spaces. This trivial handmade behavior transforms chaotic electronic trails into orderly hidden pathways.
Conclusion
The DIY flexible cable concealing channel embodies minimalist circuit-management wisdom for Japanese renters. With foldable plastic materials, simple manual bending, and traceless wall adhesion, it solves wire tangling, dust accumulation, and tripping hazards in compact rooms. It protects original wall surfaces, improves indoor safety, and maintains plain rental aesthetics. In standardized temporary living spaces, this slim plastic groove proves that domestic neatness does not require professional renovation. Through subtle handmade arrangement, renters tame messy electronic circuits, conceal technological clutter, and construct clean, orderly, and quiet residential corners in borrowed apartments.